Sunday, September 22, 2013

Guacamole con Pico de Gallo: RECIPE

One of our family-favorite snacks is tortilla chips with salsa or Guacamole con Pico de Gallo.

As Blake and I are in the middle of a 2 week Cleanse that will restrict starches - including tortilla chips - I have modified our recipe into a smoother dip, perfect for fresh vegetables.


INGREDIENTS:
3 whole, ripe avocados
1 large lime
4 whole Roma tomatoes, peeled
1 small Vidalia onion
2 whole Jalapeno peppers
1 tablespoon minced garlic
2 sprigs cilantro, finely chopped (optional)
Salt To Taste


PREPARATION:
(Guacamole)
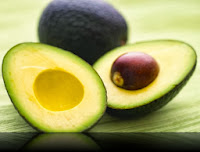
Cut avocados in halves and remove seeds. Use a spoon to scrape the avocado meat into a large bowl. Mash the avocados to a fairly smooth consistency, (I use a fork) leaving some small chunks. Sprinkle lightly with salt and squeeze in the juice of one half lime. Stir to mix, cover with plastic wrap & set aside.


(Pico de Gallo)
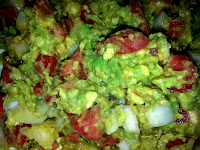
Slice jalapenos and tomatoes lengthwise and remove seeds. On a large cutting board, dice jalapenos, tomatoes and onions into very fine pieces. Add in garlic and cilantro, sprinkle lightly with salt and squeeze in the juice of the other half of lime. Toss lightly with fingers and incorporate into guacamole mixture.


This is a family sized recipe that can easily be halved.  It will store in the refrigerator for about 24 hours if plastic wrap is placed directly on the Guacamole con Pico de Gallo.


This dish serves well as a salad dressing or veggie dip and is fantastic served with grilled chicken or atop an omelet!


Tuesday, September 10, 2013

For The Love Of Mason

So what exactly is this fascination Southern folks have with drinking out of mason jars? Are we Just That Country? Is it a tradition? Or does sweet iced tea really taste that much better in a jar?

The answer is yes! to all of the above.

It is said that canning jars came about when Napoleon Bonaparte offered a reward for a method of preserving food for his traveling army. That first jar was a glass vessel, reinforced with wire and sealed with wax.

By the time the U.S. Civil War broke out, a new canning jar was in use. John L. Mason was an inventor and tin smith from New York City, and in 1858 he invented the mason jar that we recognize today. The difference between his design and previous jars was the seal:  his glass container had threads molded into the neck and a metal lid with a rubber ring.  The rubber created the seal, and the threaded lid kept it secure. Food preservation was simpler and safer than ever.

Much of The South was devastated by The War and many country families turned to sharecropping as a way to sustain life. The only way to survive a long, hot day in the cotton fields is to stay hydrated, and the easiest way to keep flies and dust out of the water was to keep it covered. Mason jars were common and the lids made transporting and drinking fresh water, or homemade brew, less a chore.

When Prohibition rolled around in the 1920's, mason jars took up a new role. The government had intended to hamper the consumption of alcohol by doing away with the businesses that made and distributed it. Instead, the moonshine industry saw a boom. With alcohol in short supply, personal backwoods stills became money-mines; the key to success was not getting caught. Mason jars were commonly used by country folk for putting up food, so they could be easily purchased without raising suspicion with the sheriff or the revenuers. The jars were smaller and lighter than pottery jugs, so they were preferred by the bootleggers who delivered the spirits, and they were transparent, so customers could gauge the clarity and quality of the product at a glance. And...they were just the right size for sippin'.

Tradition dies hard in The South and many of us still prefer 'shine, tea, lemonade and coffee straight out of Mr. Mason's jar.

So we see that the Mason Jar is rich with country tradition... but does sweet tea really taste better from a jar?

I would say so, yes. Maybe it's in the delivery - the particular angle at which the beverage goes from from the jar to your mouth - that makes the difference. Maybe it's because you're tasting pure, sweet iced tea instead of plastic chemicals.

Or maybe it just tastes like nostalgia.


MAMA'S SUN TEA RECIPE
  6 Regular Tea Bags
  Water
  A Glass Gallon Jug with Lid
  About 1 Cup of Sugar
  A Sunny Day
  Ice
Fill jug to about one inch from the top with fresh water. Drop in tea bags; cover. The best tea is made in the morning and steeps in the sun for about 4 hours. Properly served over ice and in a mason jar.


Tuesday, August 20, 2013

Farm Style Chicken & Dumplins: RECIPE

Comfort food, Soul food, Southern food - those fragrant meals that remind you of Mama's kitchen! Such culinary delights that nourish body and soul are still popular in rural southern cooking. This family favorite, Farm Style Chicken & Dumplins, is pure comfort food - a warm, cozy hug of a meal!

'Chicken and Dumplings' could be a quick and easy dish to prepare using store bought broth, chicken and canned biscuits, but I believe that the heart and soul of true comfort food lies in the preparation. No stock off the shelf will fill your house with the tempting aromas wafting from a pot full of home brew.

Drag out the apron and rolling pin and dedicate an afternoon to Farm Style Chicken & Dumplins - your efforts will be rewarded with sighs of praise as the family enjoys the tender chicken and plump, delicate dumplins swimming in rich gravy - all made from scratch.

Farm Style Chicken & Dumplins
Chicken & Stock
1 large, whole chicken
1 large onion, peeled and quartered
3 carrots, cut into chunks
3 stalks of celery, cut into chunks
3 Chicken bouillon cubes
Salt & Pepper, to taste

Dumplins
3 cups cake flour
3/4 teaspoon baking soda
3/4 teaspoon salt
4 1/2 Tablespoons lard or shortening
1 cup whole milk

Clean the chicken (remove neck, gizzards and other accessories, rinse chicken under cool, running water). Place chicken, onion, carrots, celery, and bouillon in a large (6 qt) stock pot and cover with about 1 gallon of water; season to taste with salt & pepper. Bring to a rolling boil, then reduce heat to Medium and simmer, uncovered, for 1 hour or until cooked through (165°).

When chicken is done, remove from the stock and let it cool on a plate.

Remove vegetables from the stock (cool & feed to the goat). You should have about 8 cups of the stock remaining, which is perfect.

As the chicken cools, prepare the dumplins. (Note: I use cake flour for dumplins lighter than air, but all-purpose will work in a pinch.) Mix flour, baking soda, and salt together in bowl. Cut lard (or shortening) into flour mixture with your fingertips until it resembles coarse meal. Add milk, 1/4 cup at a time (you may not need the full cup), and mix with fingers until dough forms a ball. The key to perfect dumplins: do not over-work the dough. Roll out the dough about 1/4" thick on a well floured surface - all purpose flour is fine here. Cut into rectangles about 1" wide and a couple inches long. Lay them out on floured waxed paper, sprinkle with flour and allow to firm up for 30 minutes or so. It's good to be generous with the flour here, because that is what thickens your stock into a creamy gravy.

Now, bring the chicken stock back to a slow boil. While the stock comes up to temp, remove chicken from the bone and shred into bite-sized pieces and set aside; discard bones and skin.

Drop dumplins, one by one, into boiling stock. I like to let each one drop and pop back up before adding the next. When they're all in, use a wooden spoon to move them gently from side to side; stir with too much vigor and you'll break the dumplins into clumps of dough. Reduce heat to Low and simmer for about 10 minutes to plump up the dumplins and thicken the gravy. Add chicken; cover and simmer for additional 20-30 minutes.

Farm Style Chicken & Dumplins are a delicious side dish, served with turkey or fried chicken, or as a meal (like spaghetti, but with a southern accent).

TELL ME ABOUT IT! What's your favorite comfort food?

Sunday, July 28, 2013

HOW TO: Preserving Peaches, Dry-Pack Freezer Method

Nothing says Summer In The South like a sweet, juicy peach! In this post I will explain how to preserve that fresh peach flavor for year-round enjoyment.

Peaches are very forgiving when it comes to preservation; they are delicious canned whole or as jam, bulk preserved in syrup, or dry-packed and frozen, which I will explain today.

To enjoy fresh tasting peaches year 'round, it is necessary to begin with ripe, high quality peaches. The farmer's market is your best bet for beautiful, tree-ripened produce. You want peaches that are richly colored, aromatic and that will "give" just a little with a gentle squeeze. Although you are looking for a Perfect Peach, a small bruise is acceptable, as a damaged area can be cut away.

To preserve peaches using the dry-pack freezer method, you will need:
Peaches
Lemons or lemon juice
Granulated sugar
Waxed paper
Zip-close freezer bags

Before freezing, peaches should be peeled, pitted and sliced.

The simplest way I have found to peel the peaches is by blanching. Fill a 6 quart dutch oven half full of water and bring to a boil.  Fill the sink or a tub with ice and water, leaving plenty of room to add peaches.

On each peach, cut a small X into the end opposite the stem. Set a timer for 1 minute and gently lower 6 or 8 peaches into the boiling water. Do not allow the peaches to remain in the boiling water for more than 1 minute - you do not want to cook the fruit!


Using a slotted spoon, transfer the peaches to the ice water.

As the fruit cools, combine 2 Tablespoons of lemon juice with 1/3 Cup of sugar in a large bowl. The lemon juice will help keep fruit from turning brown, and the sugar will protect the peaches from freezer burn, as well as enhance the flavor.

When fruit is cool enough to handle, begin at the X and slip off the peels.


Cut each peach in half and gently pull apart to remove the pit. Slice the peaches into the bowl of lemon-sugar and stir to coat.


Marinate the peaches in the lemon sugar for 10-15 minutes, stirring frequently. Arrange slices in a single layer on a waxed paper lined cookie sheet. Lay a second sheet of waxed paper over this arrangement and freeze until solid, about 2 hours. The most accurate way to make sure the peaches are frozen through, is to pop one right in your mouth! (Maybe not the most accurate but definitely the most fulfilling!)


Your frozen peaches are now ready to be packed into zip-close freezer bags and put back into the freezer for later use. Preserving summertime taste couldn't be easier.

These dry-packed frozen peaches should be good for at least 12 months...but they probably won't be around that long! They add fresh fruit taste to pies, homemade ice cream and smoothies, and they are a cool, refreshing treat right out of the bag.

4 Quart bags from 14 peaches!
Do you have a favorite Peach Recipe to share? Your comments are always appreciated!

Saturday, July 20, 2013

Creative Spark

"On the side of the road, beside a '76 Impala with a flat and a steamy motor, she sat on a suitcase and cried."

Last night I had the opportunity to be a sojourner in a fantastic land of imagination. Rednecks, koalas and vampires danced to punk-rock music, blared from the speakers of a rusty old truck outside a playground in West Philadelphia and...

Are you following?

That's what Creative Spark looks like.

Sixteen candles - sixteen points of light from around the globe - gathered together and sparked a bonfire.

For 8 1/2 years I believed that my ability to write - the joy that I had found in stringing together thoughts and feelings through metaphorically descriptive language - was dead and buried with the most creative person I had ever known. I thought that passion had packed up lyric and line and left me alone, and mute.

Writing was too demanding! The Pen pushed me to touch the raw nerves of emotions, and to experience experiences best left alone! The Pen tried to probe the deepest recesses of my soul, the darkest corners of my mind!

When I could no longer bear to expose myself to myself, I turned my face and let The Pen - let the writing - slip away.

Then, in the middle of the blackest, most desolate rainy night... I saw a spark.

Play by Post: sixteen candles - sixteen points of light from around the globe - gathered together and sparked a bonfire.

It reminded me of sitting cross-legged in a circle of friends, making up a story, one person after another, each adding his or her own twist:
Jack got in the car and...
...drove to the ocean to...
...buy a loaf of bread and...
...a wheelbarrow full of horseshoes.

There was a flicker; I approached with caution. I added my twist - my foot was in the door!

In a matter of moments the thoughts came flooding, washing over me in a fiery tide. Ideas began to flourish, nourished by the other players.

When it was over, I was spent; my arsenal of adjectives and adverbs depleted.

Now I ponder the Creative Spark. Where does creativity originate? Is one born creative or does one learn to express in an artistic manner?

Is creativity just a flash-in-the-pan, a jolt that strikes like lightening, and dissipates just as quickly? Or is it a slow, smoldering fire that needs only a breath of wind to reignite?

I think that people who express themselves creatively are hard-wired to do so. I believe that they - we - have an inherent need to communicate opinions, thoughts and emotions in an illustrative manner.

I compare the creative mind to the physical body.  It is said that if a person loses a sense, the other senses become sharper in order to compensate. A blind man may actually hear the pin drop. A creative writer, unable to unleash The Pen, may pick up the brush.

Eight years is an impossibly long time for embers to glow without so much as a puff of breeze. Where once a fire had roared, there remains only charred bits of coal.

What spark ignites that blazing desire to write? Time, patience, desire - not one of those things.

It was interaction with like minded people in a frolicsome setting that enkindled my imagination! It was releasing grammar, punctuation, verb tense and inhibition and allowing my creative child to play freely with words - it was that Creative Spark that brought us to this page.
This phrase.
This. word.

The barrier is coming down and a bubble of liberty replaces each falling block. The fuzzy blue and white dots of static are blending into a portrait of the artist, as I am, and who I will become. It's up to me to capture the sparks and stoke the fires. And I will, because I know I can, for on the blackest, most desolate rainy night... I found a spark.

"And as much as she had enjoyed her evening with Bucky, Alex and the gang, Syranthia knew that daylight came early on the carrot farm and there would be bunnies and tigers a'plenty to herd, so she picked up her suitcase, dried her eyes, stuck out her thumb, and walked away into the sunset."

Friday, July 19, 2013

Vanilla Coffee Frost: RECIPE

With much of the United States wilting under a brutal heat wave, coffee drinkers - and the people around them - are suffering.

If it's too hot for a cup of coffee, and the sun is melting your iced coffee, but you just can't do without your coffee... this Farmhouse Signature Recipe is for you! Skip the coffee shop and follow me to the kitchen for a cool, delicious Vanilla Coffee Frost.

INGREDIENTS
3 Cups cold black coffee (brewed)
1/4 Cup milk
3 Tablespoons Vanilla Bean Dreams Coffee Syrup
1 dozen coffee ice cubes*
1 scoop Blue Bell Homemade Vanilla (TM) ice cream 

DIRECTIONS
In blender jar combine coffee, milk, Vanilla Bean Dreams Coffee Syrup, and coffee ice cubes.
With cover in place, pulse blender in 3 second bursts until ice begins to break up. Blend at high speed until smooth.
Pour into a quart sized Mason Jar, add a scoop of ice cream to the top and Enjoy!

Speaking of Mason Jars...


***BONUS***

Save time washing up with this bonus tip: blend your Vanilla Coffee Frost right in the mason jar!


The screw on base, gasket and blade on most standard blenders will fit perfectly on a regular mouth Mason Jar! If yours does, pour it up, mix it up, and drink it up - right out of the jar.

*Coffee ice cubes are an integral element to this recipe as regular ice will leave the finished beverage watered down. I am of the opinion that it is a sin to pour coffee down the sink so, on the rare occasion when there is "leftover" coffee in the Farmhouse, I freeze it in ice cube trays. Because "leftover" coffee is uncommon around here, I often brew a strong pot and allow it to cool before pouring it up to freeze.

I invite you to give this recipe a try and, should you have suggestions for improvements, please leave them in the Comments section!

Keep it cool!

Tuesday, July 16, 2013

Grilled Stuffed Chicken Filets: RECIPE

Grilled stuffed chicken filets topped with a savory Burgundy-tomato sauce.
Yum - so good!

Great recipes can develop any time, anywhere; sometimes inspiration hits in the grocery store, sometimes in front of the pantry. Sometimes inspiration comes from someone else's recipe, as this one did.

I just adore Rachael Ray - she is a joy to watch on TV and her recipes are amazing. A short while ago she demonstrated a recipe for Mediterranean Chicken

The recipe is fantastic, but my bunch craves a little more country in the cock-a-doodle-doo, so I have adapted Rachael Ray's recipe...and taken it to the grill!

INGREDIENTS
2 cups shredded cheese, Cheddar & Monterey Jack blended
1 pound bacon, uncooked, cut into 1" squares
1 small onion, chopped
2 cloves garlic, minced
2 small pickled jalapeno peppers, finely chopped
6 boneless, skinless chicken breasts
Salt and pepper
2 tablespoons extra virgin olive oil
1/2 cup Burgundy wine
1 can fire roasted diced tomatoes (14.5 ounces)
1/2 cup chicken broth
4 cups prepared pasta or rice

DIRECTIONS
Fire up the grill!

Combine the cheese, bacon, onion, garlic and jalapeno pepper. Butterfly the chicken breasts (slit horizontally). Pound the chicken flat with a mallet; season with salt and pepper. Place cheese/bacon mixture into center of each chicken breast filet. Fold the chicken together, top over bottom, and secure open edges with round toothpicks.


In a large, heavy skillet, heat the olive oil over medium-high heat. Add the chicken and cook until browned, 3-4 minutes per side. Transfer the chicken to the hot (350°F) grill; cook completely, 15-20 minutes, with the grill covered.

As the chicken is cooking, pour the wine into the skillet and simmer for 5 minutes, stirring to release the browned bits. Stir in the tomatoes and chicken broth. Reduce heat to low, cover skillet and continue to simmer for 10 minutes.

Slice cooked chicken crosswise, serve over prepared pasta or rice, top with the Burgundy-tomato sauce.

As written, this is quite a spicy dish; if you prefer less heat, reduce the amount of jalapenos.

Where does your kitchen inspiration originate?

As always, I look forward to your questions and comments!

~Until next time!

Sunday, July 14, 2013

Fire Roasted Whisky Pecans: RECIPE

Fire up the grill, grab your cast iron skillet and get excited because I've got a new recipe for you - Fire Roasted Whisky Pecans!

Last week I hinted that I've been working on a Grown Up version of the Fire Roasted Candied Pecans and, after a couple of attempts, I have it for you.  

For the Fire Roasted Whisky Pecans I used a 11 1/4" cast iron skillet on the grill over a charcoal fire with whisky-soaked apple wood chunks for great, smokey flavor.

INGREDIENTS
2 Tablespoons unsalted butter
2 cups pecans
1/2 cup granulated (white) sugar
1/2 cup dark brown sugar
1/3 cup Honey Whisky
1 Tablespoon vanilla extract
1/4 teaspoon cinnamon

DIRECTIONS
Generously butter bottom and sides of cast iron skillet.
Combine sugars, whisky, vanilla and cinnamon in a 1.5 qt mixing bowl; mix well with a wooden spoon. Add nuts to mixture, stirring and folding to fully coat the pecans. (Other nuts could be used in this recipe but pecans have those little pockets built in - perfect for holding in delectable flavors!) Spread contents evenly into the buttered skillet.
A side rack on the grill is perfect, if you have one, as indirect heat roasts the nuts without burning the sugar. Slow roasting is the key to great flavor! Roast through the syrupy stage and until syrup crystalizes, stirring occasionally.
The temperature on my charcoal grill read 350° and I roasted the pecans for 35 minutes with the lid closed.

Be sure to use a well padded mitt during this process as the cast iron is heavy and will be extremely hot!

Allow pecans to cool for 10 minutes before turning them out onto parchment paper to cool completely.

There are no adjectives sufficient to describe the taste of these Fire Roasted Whisky Pecans. The honey whisky lends a subtle, malty flavor that is rounded out by the brown sugar - distinct but not overwhelming. The vanilla and cinnamon add delicate undertones to these mouth-watering treats. These are going to be amazing sprinkled on a dish of hand-cranked vanilla ice cream!

Fire Roasted Whisky Pecans are easy to make, delicious, and they make a lovely gift. Here they are packaged in a Cowgirl Cocktail, just one of the Not Your Typical Redneck Wine Glasses, available in my Etsy shop.


Give this recipe a try and let me know what you think! Your comments are always appreciated.

Cheers!

Wednesday, July 10, 2013

Ginson's Giveaway! 


It's called a Hillbilly Hooch Holder and it's part of the Not Your Typical Redneck Wine Glass line of stemware.. But what would YOU do with it?

Ginson's Farmhouse Chic is celebrating Christmas in July and YOU are invited to join!

To say Thank You to my readers, I will give away one (1) Hillbilly Hooch Holder to the person who comes up with the most creative use for it!

How to win: Leave your email address or other contact information, along with your comment on how you would creatively use the Hillbilly Hooch Holder, in the Comments section below.

The winner will be selected on 31 July 3013, and his or her name and Creative Comment will be announced right here!

Think hard and WOW me!

Contest Rules: 
*Open to U.S. Residents, 18 years or older.
*Email address or other contact info must be included in order for me to notify the winner and gather shipping information. If you do not wish to make your contact information visible, you can send it to me in an email at Ginger@ginsonsfarmhousechic.com, however Creative Comments must be listed in the Comments section.

Monday, July 8, 2013

What's In A Dot Com?

WELCOME BACK! And did you see the address bar? Ginson's Farmhouse Chic is now a Dot Com!

Over the past couple of weeks I've been creating, experimenting and writing. I have also been reading - a lot! I've always been a voracious reader and a night owl and the Internet has taken both traits to an almost extreme level. Point me in the direction of an article full of links and you won't hear a peep out of me for hours.

There is so much to learn - an open minded person could stay busy 24 hours a day! Whether you are looking for inspiration, motivation or your foundation, there are brilliant mentors out there who can combine to help you define your recipe for success. Allow me to introduce you to some folks I have found incredibly helpful...

Michael Nelson, The Cogent Coach, is teaching me about the impact of color and how to pen the perfect post. He has probably forgotten more about social media in the last five minutes than I'll learn in the rest of my life.

John Draper of Alabama Photo Productions is a genius behind the camera - his pictures reach beyond the lens to capture the personality of his subjects. He is teaching me about lighting and editing and has amazing insight on how to bring out the best in my product promotion shots.

Mike Allton wears The Social Media Hat and it looks great on him! He is teaching me to build a more effective blog. Interested in blogging for your business? Check him out! Want your blog posts to go viral? He can tell you how!

All of these guys are experts in their fields, and their fields of knowledge are far more diverse than I've described here. But what was that about a Dot Com?

Enter Bonnie Cribbs at bonniecribbs.com. Visualize if you will: the time is 1:00 a.m. and that 14th cup of coffee has my brain on maximim overdrive. I'm watching a Bonnie Cribbs video on blogging strategy and his first point is to Choose The Right Domain. My mind flashes on a previous video in which Mr. Cribbs had said "success is the only option." Now here he was, practically asking 'Ginger, why isn't Ginson's Farmhouse Chic a Dot Com?!'

Suddenly hours of studying articles, infographics, videos and Hangout conversations came together! Here, on my porch, in the middle of the night, ginsonsfarmhousechic.com was born. I'm so glad to see you've followed me here!

What is in a Dot Com? Commitment.The Dot Com is my commitment to you that Ginson's Farmhouse Chic is going to be here to meet your unique handcraft requirements. And the Dot Com is a commitment to myself, that final step in declaring that Ginson's Farmhouse Chic is my 'Plan A'...my success story.

My Etsy shop will remain open and you can still follow me on Google + and Facebook. Over the next few weeks I will be building my website so that all of Ginson's Farmhouse Chic will be together under one roof. Get excited!

Here is huge salute of thanks to my mentors, supporters and friends!

Who is inspiring you? Do you have tips or advice to share? Your comments are always welcomed!


Until next time...

Friday, July 5, 2013

G+ or FB: A Shadetree Mechanic's Point Of View

There are probably hundreds of trillions of words of Expert Testimony comparing Google+ to Facebook. Social Media Gurus, Marketing Geniuses and Professional Writers are analyzing and comparing statistics & features with colorful charts and graphics.

But what is the Shadetree Mechanic Point Of View? What does Average Joe (or Average Gin) have to say?  

I have had a Facebook account for several years and I enjoy it, for the most part. Facebook has been a fun gadget for keeping up with the Hatfield's and McCoy's through family photos, long-distance relationships and yes, occasional drama. I've connected with long lost cousins and friends of friends, learning the most intimate details of their lunch menus and heartbreaks.

When I began to try to expand my business I looked to G+ as an additional venue. In the first couple of weeks I joined a handful of communities, read some informative posts and tossed out some links to my own shop and blog.

Then something started happening - I began to 'engage' on G+. I commenced to comment on posts I found helpful and link to articles I was reading on my own - and BAM! The door to a whole new world opened wide. Turns out Google+ is NOT the deserted ghost town I'd read about - it is a living, breathing community of living, breathing people!

I have discovered leagues of mentors who share their social media marketing knowledge freely, fellow Etsians with whom I can interact and share ideas, people who enjoy backyard farming, good coffee and home cooking...

And friends. I've met and made friends and established relationships with people on G+ who I would have never known without it. To the naysayers who claim that Google+ isn't really a "social" network: I beg to differ. Building bonds with like-minded people IS socializing!

In my opinion, Google+ is more than a crescent wrench, it's a full toolbox with a Happy Face sticker on the side.

Does this mean I'm packing up and leaving Facebook? No. I have friends and family there with whom I connect daily. Besides, I really want to know how to burn belly fat. I am, however, going to continue developing my Google+, not only as tool to assist my professional development, but as a way to enrich my personal life as well.

In other words I'm going to shut the hood, stick my grease rag in my back pocket, top off the tank and drive right on down the middle of the road for now.

What do you think? Is comparing Facebook to Google+ like comparing oranges to orangutans?

Will G+ overcome FB as the top social network out there?   

I'm looking forward to your comments!

INFOGRAPHIC

Thursday, July 4, 2013

Rainwater Chronicles


Day Seven of Rain in Lower Alabama...  

The initial burst of joy at an opportunity to play in the rain is long gone and now the mood is just soggy.


Our rainwater buckets were over-full 3 days ago.  


The tomato plants and angel trumpets who had stood proudly soaking up liquid sunshine have begun to sag under the weight of the water.  


A lonely spider, the knitter of nature, clings tenuously in web, braced against the cool wind.  


Alas, even the waterfowl are feeling the strain of too much rain, ducking for cover under the eaves.  


Yet the rose stands tall and lovely, her beauty deep-rooted and strong, a gentle reminder that I, too, can weather the storms by keeping my face heavenward.


Sunday, June 30, 2013

Fire-Roasted Candied Pecans: RECIPE


Like most good southern cooks, I have a recipe for Candied Pecans filed away under Holiday Baking. But it's summertime in The South and heating the house with the oven is the last thing I want to do!   

My sweet tooth is craving those crunchy treats though, and I'm not willing to shell out the bug bucks at the mall so... To the grill I go!   

We fire up the charcoal grill at least five times a week in the summer, and I typically add wet *Applewood Chunks for delectable, smokey flavor. Today's menu includes deer sausage, home grown steak, garlic baked potatoes, and...


Fire-Roasted Candied Pecans!


*TIP!! When soaking wood chunks use just enough liquid to cover them. Wood soaked in a mix of half water/half honey whiskey gives an amazing flavor to food!  


I had intended to trial-run this recipe with pecans but most of my supply has disappeared (into the mouths of babes?) so today I used a combination of 1-1/2 cups pecans and 1/2 cup walnuts. I imagine almonds would be delicous as well.

INGREDIENTS
2 cups pecans
1/2 cup granulated (white) sugar
1/4 cup dark brown sugar
1/3 cup water
1 Tablespoon vanilla extract
1/4 teaspoon cinnamon

DIRECTIONS
Combine all ingredients in a one-gallon ziploc bag, shake well to fully coat the nuts. Spray a sheet of foil with nonstick spray and secure it on grill rack. An upper rack is perfect if you have one as indirect heat roasts the nuts without burning the sugar. Slow roasting is the key to great flavor!
Spread coated pecans in an even layer on the foil. Roast through the syrupy stage and until syrup crystalizes, stirring occasionally.
I was cooking on an open grill for about 45 minutes then I allowed the nuts to cook an additional 45 minutes with the grill closed, for a total of 90 minutes. Had I kept the grill closed for the entire process the nuts probably would have been finished in 45 minutes or less.

Results? Out of this world! Reminds me of Aunt Ruby's Pecan Pie. They are sweet - but not too sweet - and crunchy; mellow  with cinnamon and vanilla and those sultry,  smokey undertones...

These Fire Roasted Candied Pecans would be delightful on oatmeal, ice cream or cinnamon rolls - but I don't think this batch will last that long.   Maybe next time...in fact, I have an idea for a Grown Up version...

But that will be another post~
See you then!

Friday, June 28, 2013

Mowing the Lawn with Coconut Oil

Today's forecast for Lower Alabama: 92° with a slight chance of rain. PERFECT! These are ideal conditions for Mowing the Lawn with Coconut Oil!

You have probably read all about the benefits of coconut oil - if not, there is an interesting article HERE.

But mowing the lawn with it? That's absurd! Unless you've got all the details.

As I mentioned in PIN REVIEW: Homemade Moisturizing Lotion, I use a lot of coconut oil. It is a great moisturizer for skin and hair because it is one of the few oils that penetrates rather than just coating. It effectively removes makeup and moisturizes the delicate under-eye area. I massage it into my puppy's hide, he has very dry skin, because it hydrates his skin and it's lick-safe. I even have a friend who uses coconut oil in place of butter in her cooking (bless her heart!)

But this post is Mowing the Lawn with Coconut Oil! What's that about?

It's really about a coconut oil health food mask that leaves dry, brittle hair in amazing condition! The mask is a simple pre-wash treatment that only requires 3 items: coconut oil, a plastic shower cap, and a heat source.

To use this miracle treatment, start with a big dollop of coconut oil - my hair is thick and curly so I require an extra large serving. The oil is going to be solid at first but the heat from your hands will melt it.

Start at the roots and begin working the oil through your hair. I put some effort in at the roots as scalp massage is supposed to stimulate growth! Saturate your hair, working the oil in with your fingers and directing it toward the ends and any area prone to dryness. When your hair is completely soaked, cover it with the plastic shower cap; if you have long hair, you may want to twist it up on top of your head first. So now your hair is ready but your hands are slick with coconut oil! Take it to your skin, your knees and elbows will thank you!

Applying heat to the hair mask is not absolutely necessary but it does seem to open the hair cuticle, allowing for even better absorption of the coconut oil. Without heat, I typically marinate my hair for at least two hours - with heat, at least an hour. I have been known to run around all day painted up in coconut oil!

If you choose the heat method you have several options including the blow dryer or a hot towel. My preference is natural heat - and THAT is where the lawn mower comes in!

Cutting grass at 92° burns calories, loads me up with Vitamin D, sweats the pores, provides the cows a tasty green snack, and generates the heat to help hair soak up the benefits of coconut oil! Before I crank up Ol' Blue, I also slather my skin with coconut oil. Coconut oil has an SPF somewhere between four and ten and, mixed with a few drops of peppermint oil, it is an effective (and safer than deet) insect repellent.

Ol' Blue
When your time is up, and before shampooing, rinse hair with cool water to help close the cuticle and seal in all of that good coconutrition (I totally just made up that word!). Then shampoo, focusing on roots, and condition as you normally would. You should see a difference after only one application but your hair will continue to improve with repeated use. This coconut oil hair mask can be used every time you mow the lawn or as often as you like - I have found that a once a week treatment leaves my naturally curly hair soft, silky and nearly frizz free.


Have you gone nuts over coconut? I would love to hear how you are using coconut oil - your comments are always welcome!

Saturday, June 22, 2013

Vanilla Coffee Syrup Recipe: Vanilla Bean Dreams

 While plundering through the pantry last weekend I perceived a prize! A lone Vanilla Bean,  properly stored in a cool, deep corner.  Peacefully he rested, content in Vanilla Bean Dreams of muffins and ice cream - little knowing, or caring, that his fate lay instead as the foundation for not one but two culinary delights.

As I mentioned in my recent post "Farmhouse Signature Vanilla Iced Coffee", I have become a huge fan of iced coffees! The recipe in that post calls for Torani (TM) Vanilla Flavoring Syrup and the recipe makes an amazing glass of coffee.  I was sure that I had created THE perfect vanilla iced coffee...but isn't there always room for improvement. Yes. Yes there is.

Over the course of several days I have toyed around with several mini-batches, all based on simple syrup (equal parts sugar and water) and vanilla. Along the way I have adjusted the amount of vanilla and the type of sugar, always sparing the Bean. I knew that the syrup must be near-perfect before the Bean could be introduced for, as every kitchen artist knows, vanilla beans are quite pricey!

Each trial batch has yielded a good vanilla syrup - and several quart jars of good vanilla iced coffee. But I'm not reaching for good - I'm reaching for excellence!  I believe that excellence has been achieved today. Vanilla Bean Dreams that exceed my greatest expectation are coming to life now in a Mason Jar full of the best tasting beverage I've ever enjoyed.

I have poured a very "clean" iced coffee; this is coffee, milk, ice and Vanilla Bean Dreams Syrup. There is no ice cream, non dairy creamer or added sugar, as I don't want any taste interference. It is really good, with a complex flavor profile I have not found with prior recipes, and I attribute that to the specific ingredients used.

So without further ado...the recipe:

VANILLA BEAN DREAMS SYRUP 
     3 1/2 cups distilled water
     3 cups granulated sugar
     1/2 cup dark brown sugar
     1 vanilla bean
     3 tablespoons vanilla extract
Split vanilla bean in half lengthwise and scrape the seeds into a clean, pint mason jar.
Place bean pod into a medium saucepan along with the water and sugars. Cook over medium-high heat for approximately 15 minutes, stirring constantly. Mixture should come to a slow boil and become thick and syrupy. Cool completely and stir in vanilla extract. Fill sterile quart mason jar with cooled syrup, making sure to include vanilla bean. Cover tightly with lid; store in a cool place.

Vanilla Bean Dreams Syrup, in place of Torani's, brings Farmhouse Signature Vanilla Iced Coffee to a sweet crescendo, and should be a divine addition to milkshakes, yogurt, lattes...let your imagination run wild!

But wait...there's more! What about those vanilla bean seeds we painstakingly scraped out of the pod? Surely they won't go to waste?

Don't take your apron off just yet...we have one more thing to do!

BONUS!!!  

VANILLA BEAN DREAMS INFUSED SUGAR
     Seeds from 1 vanilla bean
     2 cups granulated sugar
Pour 1 cup of sugar into the pint jar containing the seeds scraped from the vanilla bean when the syrup was made. Cover tightly with lid and shake vigorously to incorporate the seeds into the sugar. When the seeds are quite evenly distributed add the 2nd cup of sugar, replace lid and shake again.
Allow the vanilla infused sugar to sit for a week or more, shaking or stirring occasionally. Vanilla Bean Dreams Infused Sugar can be used in place of regular, granulated sugar in tea or coffee, sprinkled over oatmeal, or as a topping for fresh fruit.

So there you go! Two lovely, gourmet-quality sweeteners from a single Vanilla Bean!   Packaged beautifully, this pair would make a darling birthday, holiday or hostess gift and what a perfect way to say "thank you...for making life sweeter!"

I would like to point out a few things about three of the key ingredients in the syrup recipe. In my trials I did find that these specific ingredients truly affected the flavor of the final product.

1) Distilled Water
Simply stated, water chemistry affects flavor. This recipe will call for sugar to be melted - we absolutely do not want the sugar to burn! After a couple of trials I realized that the mineral content of tap water is too high to get a clean syrup.  As the syrup boils down, mineral deposits from tap water form on the sides of the saucepan. The thickened syrup sticks to the deposits, forming a crust which blackens and burns around the edges. Using distilled water helps keep the syrup from taking on a burnt taste.

2) Dark Brown Sugar
While brown sugar makes up only a fraction of the sugar required for this recipe, it is a key component. The molasses in brown sugar adds depth and richness to the syrup and amplifies the vanilla.

3) Vanilla
For this recipe I layered the vanilla flavor by using both vanilla extract and vanilla bean.
*The vanilla bean enters the scene in the first act, releasing flavor as the syrup cooks down, and will remain in the finished syrup. The bean pod will continue to add essence as it lingers.
*Vanilla extract is added after the syrup has cooled. As extract is alcohol-based, adding it while the syrup is hot would allow the alcohol, and the vanilla flavor, to evaporate without fully infusing the syrup. And that would never do!

I hope you enjoy the Vanilla Bean Dreams recipes as much as i do! As always, your questions and comments are appreciated.

Until next time... 
Good night and, 

  • Sweet Vanilla Bean Dreams!

Thursday, June 20, 2013

PIN REVIEW: Homemade Moisturizing Lotion


Ahhh...PINTEREST, that delightful online corkboard for organizing and displaying pictures of the things that inspire us, has quickly become one of the hottest social media sites around. Users can upload, save and sort images (pins), follow other users and repin from their boards or directly from the internet. Categories include Food & Drink, Travel, Gardening, Education, and my favorite: DIY & Crafts.

But does that DIY stuff really work? Do the recipes turn out like the pictures suggest? I decided to do a test...

One of the recurring pin themes I've noticed on PINTEREST is homemade body lotion recipes. As an avid do-it-yourselfer and moisturizer hoarder collector, these pins got my attention! Today I have recreated one of the more common recipes so let's take a look at the ingredients, the process and the results!

While there was quite a selection to choose from, I elected to follow this guideline:
1 part Vitamin E Cream
1 part solid coconut oil
2 parts baby lotion


The process couldn't be much simpler: place the ingredients in a bowl and whip with a mixer until the mixture resembles fluffy, pink cake frosting. Store in airtight container (read: Mason Jar! )

Before we check out the results, let's take a look at the 'science' behind this recipe.

Vitamin E
According to THIS NBC news article, Vitamin E, applied topically, eases dryness by helping skin retain its natural moisture. It may neutralize damaging free radicals and reduce the unstable molecules present after exposure to cigarette smoke. For my lotion I used 4 oz of Vitamin E SkinCare Cream.

Coconut Oil
The benefits of coconut oil are being touted worldwide! An ARTICLE in the Farmer's Almanac  explains that coconut oil is rich in lauric acid, capric acid and caprylic acid, which makes it beneficial as an antimicrobial, antioxidant, antifungal, and antibacterial. As a moisturizer, coconut oil speeds healing of flaking, cracked skin, prevents wrinkles, and helps in the treatment of eczema, psoriasis, and other chronic conditions. Coconut oil is a solid that quickly becomes liquid when subject to heat, and returns to a solid when cooled. I have used coconut oil as a moisturizer for skin and hair and I love it! For today's experiment I used 4 oz of pure coconut oil.

Baby Lotion
Baby lotion smells really good (that's personal opinion, not necessarily science)! I haven't done research on the individual components of baby lotion, but in my experience this mild lotion is appropriate for delicate skin. It absorbs quickly and hydrates well. The creamy formula helps stabilize the coconut oil in this recipe. I have used 8 oz of pink baby lotion in this trial.  

So what about the results? Is this Homemade Moisturizing Lotion that's popping up all over PINTEREST really worth the effort?

On a 1-10 scale I rate it a 10!

Finding the ingredients: 10!
All of the ingredients were readily available in my local super center.

Cost of ingredients: 10!
Supplies to make 3 1-pint batches cost less than $14 and I had both coconut oil and baby lotion left over.

Preparation/process: 10!
Total time including measuring, mixing & packaging was 9 minutes, 13 seconds!  I can live with that!

The finished product: 10!
Because the 16 oz of ingredients are whipped, there was enough finished product to fill a pint mason jar - and plenty left over to slather on! The lotion is thick, rich and creamy but goes on light as air. The skin is moist, with a soft sheen, but doesn't feel greasy. And the scent is delightful! I used the pink baby lotion this time around but I am sure I will try the others eventually.

Homemade Moisturizing Lotion Rates A 10! 
This PIN is a WIN!   


Have you made this lotion? Tweaked the recipe? I would love to read your comments and suggestions!


Monday, June 3, 2013

Farmhouse Signature Vanilla Iced Coffee: RECIPE 


Oh coffee, how I adore thee! I drink coffee 365 days a year! It is never too hot or too late in the day for me to enjoy a good cup of coffee!

Only recently have I jumped on board the Iced Coffee Train and added Vanilla Iced Coffee to my routine. My first Vanilla Iced Coffee was a Golden Arches treat - then I discovered the Starbucks variety. Anything that delightful is going to be illegal,  immoral or fattening (in this case, probably all three) but there is an even darker side to this delicious coffee treat: it is NOT budget-friendly!

It was with that thought in mind that I began my quest for the perfect Farmhouse Signature Vanilla Iced Coffee and I believe I have achieved exquisiteness with this recipe. BEWARE:  while this is a much more budget-friendly coffee concoction, it is not at all diet-friendly! So without further ado, The Recipe:

Farmhouse Signature Vanilla Iced Coffee

1 C hot black coffee (brewed)
2 t dark brown sugar
2 t granulated (white) sugar
3 t non-dairy creamer (powder)
1 1/2 T Torani (TM) Vanilla Flavoring Syrup
1 dozen coffee ice cubes*
1 scoop Blue Bell Homemade Vanilla (TM) ice cream 
2 C cold black coffee (brewed)

In a quart sized mason jar combine hot coffee, sugars and creamer; stir well to melt sugars and incorporate creamer. Stir in vanilla flavoring syrup. Add coffee ice cubes* and ice cream. Fill the jar with cold black coffee and stir well to marry the flavors. Wrap the jar in your favorite Quilted Mason Jar Coozie and Enjoy! ♥

*Coffee ice cubes are an integral element to this recipe as regular ice will leave the finished beverage watered down. I am of the opinion that it is a sin to pour coffee down the sink so, on the rare occasion when there is "leftover" coffee in the Farmhouse, it is poured up into ice cube trays and frozen. As "leftover" coffee is such an anomaly around here, I will occasionally brew a strong pot and allow it to cool before pouring it up to freeze.

I invite you to give this recipe a try and, should you have suggestions for improvements, please leave them in the Comments section!

Like this recipe? Make a great thing even better by using Vanilla Bean Dreams Syrup in place of Torani (TM)!

(ingredients listed are the actual ingredients I use; I am not compensated to endorse any of these products)

Sunday, May 26, 2013

Treasure Hunting

My friend LaDonna LOVES going to yard sales! She refers to yard sale shopping as Treasure Hunting, and every time she has asked me to go,  I have politely declined. Not because I don't enjoy yard sales - oh I do! I just think they should begin at noon or so.

I'm not a lazy person - except on Saturday mornings. Saturday morning is MY time - to be quiet and sit on the porch and have coffee and do nothing...but be quiet and sit on the porch and have coffee. Getting up at the first crack of daylight - without coffee - to go dig through someone else's 'stuff' does not fit well with my Saturday morning routine.

At some point early last week I decided to go Treasure Hunting with LaDonna and that this was the weekend to do so. I got together with my friend and we formulated a fool-proof plan for success. I won't go into detail except to say that this plan included pizza and ice cream and falling asleep watching TV Friday night and some fast food joint liquid that barely passed for coffee in the wee early hours of Saturday morning.

I have no idea how many miles we traveled, how many neighborhoods we visited, or how many yards we raided. For about ten bucks a piece we ended up with a pretty decent haul. We  each caught some good deals on some pre-loved stuff for our own collections at a fraction of Manufacturer's Suggested Retail Price and at the end of our trip I felt ever so rich! Not because I got that little red-yellow-blue & green tool box that reminds me of my Mom (for practically nothing!) or because the set of still-new-with-tags-on-them kitchen towels were only a quarter...those were great bargains but I found something more!

I found that while really good pizza might taste better paired with a really good cabernet, it tastes better yet when shared with a really good friend and really good conversation. I found that shivering while eating ice cream, and laughing about it on the way home, probably burns all the calories right out of the ice cream - and if it doesn't,
it's ok: the sun will still come up. I found that I can actually survive a day on one cup of lousy coffee.

And I found that some things work better when they're broken - like the quiet of a Saturday morning broken by the sounds of friendship.

And that is a treasure worth hunting.

Ginger B. Schneider
http://www.etsy.com/shop/GinsonsFarmhouseChic